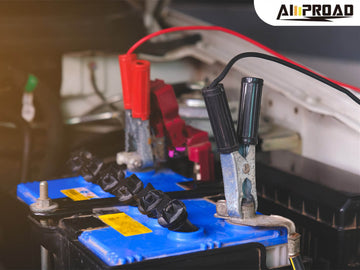
Jump-starting a car battery is a valuable skill that can prevent unexpected roadside delays. Knowing the right tools and steps ensures a safe and effective process. Essential equipment includes jumper cables, a portable jump starter, or a car battery charger, each playing a key role in reviving a dead battery. Understanding their proper use minimizes risks and enhances efficiency. With the right approach, a successful jump-start can quickly get a vehicle back on the road without unnecessary complications.
Up next, a comprehensive breakdown of jump-starting your vehicle, both with jumper cables and a portable jump starter. You won't want to miss this!
Steps for Jump-Starting with Jumping Cables
When faced with a dead car battery, and the car won’t start, setting up the jumping cables correctly is crucial for a successful and safe jump-start. This process involves a few key steps, and attention to detail is paramount.
Setting up the Jumping Cables Correctly
Selecting the Right Cables: Begin by choosing a set of high-quality, heavy-duty jumper cables. Quality jump cable ensures efficient power transfer and reduce the risk of overheating during the jump-start process. If available, consider using jumper cables from reputable manufacturers known for their durability and safety features.
Identifying Battery Terminals: Before connecting the cables, it's essential to identify the positive and negative terminals on both the dead and charged batteries. The positive terminal is typically marked with a “+” sign and is often red, while the negative terminal is marked with a “-” sign and is usually black. Familiarizing yourself with these markings helps avoid confusion during the setup.
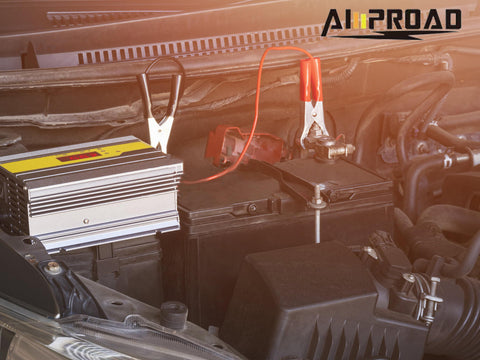
Positioning Vehicles: Park the vehicle with the charged battery close enough to the one with the dead battery but ensure they are not touching. Turn off the engines of both vehicles, engage the parking brakes, and make sure both vehicles are in either "Park" (automatic transmission) or neutral (manual transmission).
Attaching the Jumper Cables: With both vehicles turned off, open the hoods and locate the batteries. Begin by connecting the red (positive) jumper cable clamp to the positive terminal of the dead battery. Ensure a secure connection by firmly gripping the clamp onto the terminal.
Connecting to the Charged Battery: Moving to the vehicle with the charged battery, attach the other red (positive) clamp to the positive terminal of its battery.
Connecting the Black (Negative) Cable: Connect the black (negative) jumper cable clamp to the negative terminal of the charged battery. It's important to note that the final black clamp should not be attached to the dead battery's negative terminal. Instead, find a clean, unpainted metal surface on the engine block or frame of the car with the dead battery. This helps reduce the risk of sparks near the battery.
Ensuring a Secure Connection: Once all the cables are securely attached, visually inspect the connections to ensure there is no fraying or exposed wire. A secure and clean connection is vital for a safe and effective jump-start.
Starting the Engine: Start the engine of the vehicle with the charged battery and let it run for a few minutes. This allows the dead battery to receive a charge.
Attempting to Start the Dead Vehicle: After letting the charged vehicle run, try starting the engine of the car with the dead battery. If it starts successfully, leave both vehicles running for a few more minutes to allow the dead battery to charge further.
Removing the Jump Cables: Once the dead vehicle is running smoothly, carefully disconnect the jumper cables in reverse order. Start by removing the black clamp from the unpainted metal surface, then detach the black clamp from the charged battery's negative terminal. Finally, remove the red clamp from the charged battery and, lastly, detach the red clamp from the previously dead battery's positive terminal.
Safety Precautions During the Process
While jump-starting a car battery is a relatively straightforward process, it's essential to prioritize safety at every step. Adhering to safety precautions ensures not only a successful jump-start but also protects you and your vehicles from potential risks.
Eye Protection: Before initiating the jump starter starting process, consider wearing eye protection, such as safety glasses. This precautionary measure guards against any accidental sparks that may occur during cable connection or disconnection.
Avoiding Contact: Throughout the process, it's crucial to avoid physical contact with the vehicles and cables. Keep your hands, clothing, and any other body parts away from the engine compartments to prevent injury.
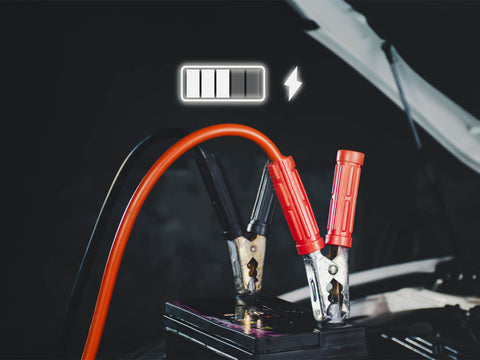
Mindful Cable Placement: Ensure that the jumper cables are placed away from moving engine parts, belts, and fans. Securing the cables and keeping them clear of any potential entanglements minimizes the risk of accidents.
Following Manufacturer Guidelines: Refer to the manufacturer's guidelines for both the jumper cables for car and the vehicles involved. These guidelines may provide specific instructions or precautions tailored to your equipment.
Checking for Damage: Before using the car battery jumper, inspect them for any visible damage, such as frayed wires or exposed metal. Damaged cables should not be used, as they pose a safety risk and may compromise the effectiveness of the jump-start.
Maintaining a Safe Distance: During the jump-start process, keep a safe distance from the engine compartments of both vehicles. This precaution ensures that you are out of harm's way in case of unexpected events.
Extinguishing Flames: In the rare event of a spark causing a small fire, having a fire extinguisher on hand is a wise precaution. Make sure you know how to use the extinguisher properly and keep it within easy reach.
Seeking Professional Help: If you're uncertain about any aspect of the jump-start process or encounter difficulties, it's advisable to seek professional assistance. Professional help ensures that the jump-start is performed safely and efficiently.
Avoiding Overexertion: Jump-starting a car battery can be physically demanding, especially if done manually with traditional cables. If you feel fatigued, it's important to take breaks and avoid overexertion to prevent accidents or injuries.
Environmental Considerations: Be mindful of your surroundings, especially in adverse weather conditions. Avoid jump-starting a car in rainy or wet environments whenever possible, as water can increase the risk of electrical shock.
Using a Portable Car Battery Jump Starter
Introduction to Portable Car Battery Chargers
Portable car battery boosters have become indispensable tools for drivers, offering a convenient solution to unforeseen battery issues. These compact devices are designed for on-the-go use, providing a reliable means of how to boost a car with a dead battery without the need for another vehicle. The significance of portable battery booster for car lies in their versatility; equipped with various charging modes, they cater to a range of battery types and sizes, making them a must-have accessory for every driver.
Modern advancements have endowed these car battery jump starters with intelligent features such as automatic voltage detection, reverse polarity protection, and user-friendly interfaces. Their compact design allows for easy storage in the trunk, making them an essential companion for road trips, emergencies, or daily commuting. With some models even featuring built-in USB ports, portable jumper cables have evolved into multifunctional devices capable of charging smartphones and other electronic gadgets.
As we delve into the step-by-step guide on safely using a portable car battery starter jumper, it's essential to recognize the value these devices bring to drivers. They empower individuals to overcome unexpected battery challenges with confidence and ease, fostering a sense of self-reliance on the road.
Step-by-Step Guide on Safely Using a Portable Car Jump Starter
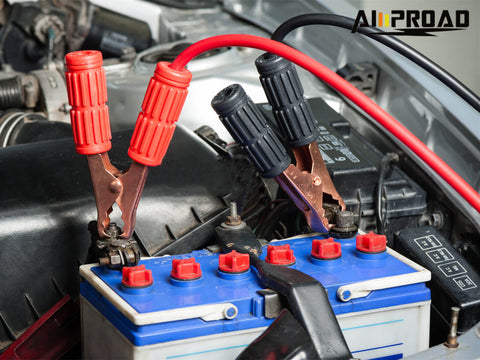
Using a portable car battery booster is a straightforward process when done correctly. This step-by-step guide ensures a safe and effective jump-start, helping you navigate the process with ease.
Choose the Right jump starter: Begin by selecting car jumper jump starter that suit your vehicle's requirements. Consider factors such as power output, compatibility with various battery types, and additional features like USB ports.
Read the User Manual: Familiarize yourself with the user manual accompanying the jumper. Understanding the manufacturer's instructions ensures you use the device correctly and optimally.
Ensure a Safe Environment: Park your vehicle in a safe and well-ventilated area. Turn off the ignition, engage the parking brake, and remove any metal jewelry to minimize the risk of accidents.
Inspect the jump starter: Before connecting the car jump starter, inspect it for any visible damage. Ensure that the cables are in good condition, with no frayed wires or exposed metal. A well-maintained charger enhances safety during use.
Connect the jump starter to the Battery: Open the hood of your vehicle and locate the battery. Connect the positive (red) clamp of the jump starter to the positive terminal of the battery. Follow this by attaching the negative (black) clamp to the negative terminal.
Set Charging Parameters: Some jump starters allow you to set charging parameters, such as voltage and charging mode. Refer to the user manual to configure these settings according to your vehicle's specifications.
Power On the jumper starter: Once the connections are secure and the settings are configured, power on the jump starter. Most modern chargers have user-friendly interfaces with indicators to guide you through the charging process.
Monitor the Charging Process: Keep an eye on the jump starter as it works. Pay attention to any unusual sounds or excessive heat. If you notice anything out of the ordinary, disconnect the jump starter immediately and reassess the connections.
Complete the Charging Process: Allow the jump starter to complete the charging process. This duration varies based on factors like battery size and the level of depletion. Refer to the user manual for an estimate of the charging time.
Disconnect the jump starter: Once the charging process is complete, power off the jump starter and disconnect it from the battery. Remove the negative (black) clamp first, followed by the positive (red) clamp.
By following this step-by-step guide, you can confidently and safely use a portable car battery jump starter to revive your vehicle's battery. These jumper starters, with their user-friendly features and compact design, empower drivers to address battery issues independently, ensuring a smooth and reliable experience on the road.
Mastering safe jump-starting procedures is crucial for every driver. Whether using jump starter, portable car battery jump starters, or jump starters, prioritizing safety ensures a smooth and secure process. This skill empowers individuals to overcome unexpected battery challenges, fostering a sense of confidence and self-reliance on the road.
To enhance your preparedness for emergencies, consider keeping essential tools like portable car battery jump starters and jump starters in your vehicle. These compact and versatile devices can be lifesavers when facing unexpected battery issues. By having these tools on hand, you not only ensure your safety but also contribute to a stress-free driving experience, knowing that you're well-equipped to handle unforeseen challenges on the road.

