


Curious about ensuring your jump starter is ready for action when your car battery fails? Understanding how to effectively test a jump starter is essential for vehicle owners, providing peace of mind in emergency situations. In this guide, we'll explore the ins and outs of jump starter testing, covering key components, battery capacity assessment, testing procedures, safety precautions, and maintenance tips. By the end of this article, you'll have the knowledge and confidence to verify the functionality of your jump starter, ensuring it's always prepared to revive your vehicle's battery when needed. Whether you're a seasoned mechanic or a novice car owner, mastering the art of jump starter testing is a valuable skill that can save you time, money, and hassle when faced with a dead battery.
How Does a Jump Starter Work?
Curious about how to boost a car with a jump starter? Let's start by understanding the basic functionality and components of this essential tool. A jump starter is a portable device designed to provide a temporary power boost to a vehicle's battery, allowing it to start when the battery is dead or discharged. The primary components of a jump starter include a battery pack, jumper cables, and safety features such as surge protection and reverse polarity protection. The battery pack stores electrical energy, which is then transferred to the vehicle's battery through the jumper cables.
When the vehicle's battery is unable to provide enough power to start the engine, the jump starter acts as an external power source, delivering the necessary voltage to crank the engine and ignite the combustion process. This process effectively jump-starts the vehicle, allowing it to operate normally. Jump starters are particularly useful in emergency situations where access to traditional methods of jump-starting, such as jumper cables and a running vehicle, may not be available.
To use a jump starter effectively, follow these steps:
- Position the jump starter near the vehicle's battery, ensuring that it is securely grounded and away from moving parts.
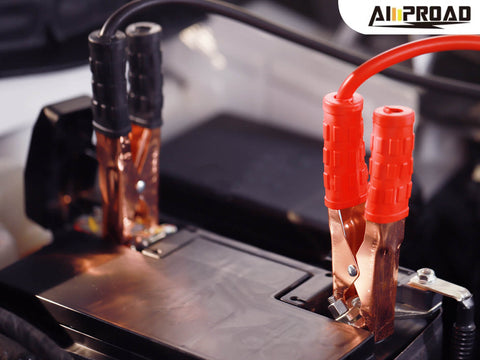
- Connect the positive (+) jumper cable clamp to the positive terminal of the vehicle's battery.
- Connect the negative (-) jumper cable clamp to a metal, unpainted surface of the vehicle's engine block or chassis, away from the battery.
- Turn on the jump starter and wait for the indicator lights to signal that it is ready to use.
- Start the vehicle as you normally would, and once it has started successfully, disconnect the jumper cables in the reverse order of connection.
By understanding how a jump starter works and following these steps, you can confidently use this indispensable tool to boost a car's battery and get back on the road in no time.
What Are the Key Components of a Jump Starter?
The primary components of a jump starter include the battery pack, jumper cables, and safety features. The battery pack serves as the power source, storing electrical energy that is used to provide the necessary voltage to jump-start a vehicle's battery.
Jumper cables are another vital component of a jump starter, serving as the conduits through which the electrical energy from the battery pack is transferred to the vehicle's battery. These cables typically consist of heavy-duty wires with insulated clamps at each end to securely connect to the vehicle's battery terminals. Proper connection of the jumper cables is essential for ensuring a safe and effective jump-start.
In addition to the battery pack and jumper cables, jump starters often feature various safety features to protect both the vehicle and the user during the jump-starting process. These safety features may include surge protection to prevent damage from power spikes, reverse polarity protection to prevent damage from incorrect cable connections, and overcharge protection to prevent damage to the jump starter's battery pack.
Understanding the key components of a jump starter and their roles in jump-starting a vehicle is essential for safe and effective use. By familiarizing yourself with these components and how they work together, you can confidently handle emergency situations where a jump start is needed. Whether you're a seasoned mechanic or a novice car owner, having a reliable jump starter with properly functioning components is essential for ensuring peace of mind on the road.

Can You Test a Jump Starter's Battery Capacity?
Wondering if you can evaluate a jump starter's battery capacity? Indeed, several methods can help assess its effectiveness. One common approach involves using a multimeter to measure the voltage output of the jump starter's battery. Start by fully charging the jump starter, then use the multimeter to check the voltage output. Compare the reading to the manufacturer's specifications to ensure it falls within the expected range. Additionally, performing a load test can provide insight into the battery's capacity. This involves connecting the jump starter to a load resistor and monitoring how long it can sustain the voltage output under load. If the battery quickly drops below the specified voltage threshold, it may indicate a lower capacity.
Another method involves using the jump starter to jump-start a vehicle and observing its performance. If the jump starter struggles to start the vehicle or if the battery drains rapidly during the process, it may suggest a diminished battery capacity. Regularly testing the battery capacity of a jump starter is essential to ensure its reliability during emergencies. By employing these methods, you can verify the effectiveness of your jump starter and address any issues proactively, ensuring it's always ready to assist when needed.
What Are the Steps to Test a Jump Starter's Functionality?
Testing a jump starter's functionality is crucial to ensure it can effectively jump-start a vehicle when needed. Here's a step-by-step guide to testing a jump starter:
- Check the Jump Starter's Charge: Before testing, ensure the jump starter is fully charged. Follow the manufacturer's instructions for charging, and confirm that the indicator lights or display show a full charge.
- Connect the Jump Starter: Position the jump starter near the vehicle's battery. Connect the positive (+) jumper cable clamp to the positive terminal of the vehicle's battery. Then, connect the negative (-) jumper cable clamp to a metal, unpainted surface on the vehicle's engine block or chassis.
- Turn on the Jump Starter: Activate the jump starter according to the manufacturer's instructions. This usually involves pressing a power button or switch. Wait for the jump starter to indicate that it's ready for use, usually through indicator lights or a display screen.
- Start the Vehicle: Once the jump starter is ready, attempt to start the vehicle as you normally would. Turn the ignition key or press the start button. If the jump starter is functioning correctly, it should provide the necessary power to the vehicle's battery, allowing the engine to crank and start.
- Monitor the Jump Starter: While attempting to start the vehicle, monitor the jump starter for any signs of overheating or unusual behavior. If you notice any abnormalities, such as excessive heat or smoke, stop the test immediately and disconnect the jump starter.
- Disconnect the Jump Starter: After successfully starting the vehicle, disconnect the jump starter from the battery. Remove the negative (-) jumper cable clamp first, followed by the positive (+) clamp. Be sure to handle the jump starter and cables carefully to avoid any accidental shocks or damage.
By following these steps, you can effectively test a jump starter's functionality and verify its ability to jump-start a vehicle. Regular testing ensures that your jump starter is in good working condition and ready to assist in emergency situations.
Are There Any Precautions to Take When Testing a Jump Starter?
When testing a jump starter, it's crucial to prioritize safety to prevent accidents or damage. Firstly, ensure that both the jump starter and the vehicle's battery are in good condition before proceeding with the test. Inspect the jump starter for any visible damage or signs of wear, such as frayed cables or leaking battery fluid. Likewise, check the vehicle's battery terminals for corrosion or loose connections, as these issues can affect the jump start process. Taking these initial precautions can help minimize the risk of accidents or damage during testing.
Next, carefully follow the manufacturer's instructions for operating the jump starter. Pay close attention to the recommended procedures for connecting and disconnecting the jump starter to the vehicle's battery. Improper handling or incorrect connection of the jumper cables can lead to sparks, electrical shocks, or damage to the vehicle's electrical system. Additionally, avoid touching the metal clamps of the jumper cables together while the jump starter is activated, as this can create a short circuit and potentially cause injury or damage.
During the testing process, monitor the jump starter closely for any signs of overheating or unusual behavior. If you notice excessive heat or smoke coming from the jump starter, immediately disconnect it from the vehicle's battery and stop the test. Overheating can indicate a malfunction or internal fault within the jump starter, and continuing the test could lead to further damage or injury. Similarly, if the vehicle fails to start after several attempts with the jump starter, refrain from prolonged cranking as this can strain the jump starter and drain its battery.
By taking these precautions and following safe practices, you can test a jump starter effectively while minimizing the risk of accidents or damage. Prioritizing safety ensures a smooth and successful testing process, allowing you to verify the functionality of the jump starter without putting yourself or your vehicle at risk.
How Often Should You Test Your Jump Starter?
Regular testing of your jump starter is essential to ensure its reliability and readiness for emergency use. It's recommended to test your jump starter at least once every three to six months, depending on how frequently you use it and the storage conditions. If you live in an area with extreme temperature fluctuations or store your jump starter in a vehicle exposed to harsh weather conditions, more frequent testing may be necessary. By testing your jump starter regularly, you can identify any potential issues or malfunctions early on and address them before they become a problem when you need to use the jump starter in an emergency.
Additionally, it's a good idea to test your jump starter after any prolonged periods of storage or inactivity. Batteries can self-discharge over time, especially if they're not used regularly. Testing your jump starter before storing it away for an extended period can help ensure that it's still in good working condition and ready for use when needed. Performing regular maintenance checks, such as inspecting the cables and connections for damage or corrosion, can also help keep your jump starter in optimal condition and extend its lifespan. By incorporating jump starter testing into your regular maintenance routine, you can have peace of mind knowing that your jump starter is always prepared to assist you in starting your vehicle in case of a dead battery.